Contributing to the CDS Handbook
The CDS Handbook is a shared resource, maintained collaboratively across the company. If you spot something out of date, want to add a new page, or improve existing content, this guide explains how to do it.
All changes go through a pull request (PR) review before appearing on the live site. This keeps the quality and consistency of the handbook high.
Before you start
You need:
- An Azure DevOps (ADO) account — everyone at CDS has one
- Access to the repository: CDS External Handbook on ADO
If you cannot access the repository, speak to your line manager.
Branch naming convention
Whether you edit via the browser or locally, your branch name must follow this pattern:
Keep the description short (2–4 words, hyphen-separated) and descriptive of your change.
Examples:
| Who | Change | Branch name |
|---|---|---|
| Sarah Jones | Adding a security tools page | contrib/sarah-jones/add-security-tools-page |
| James Smith | Updating the delivery approach | contrib/james-smith/update-delivery-approach |
| Alex Taylor | Fixing typos on the values page | contrib/alex-taylor/fix-typos-values-page |
Making changes via the browser
The simplest way to contribute — no software to install.
Editing an existing page
-
Open the repository in ADO.
-
Click Files in the left-hand sidebar, then navigate to the
docs/folder and find the file you want to edit.Tip
Each handbook page corresponds to a
.mdfile indocs/. For example, the Life at CDS page isdocs/about/life-at-cds.md.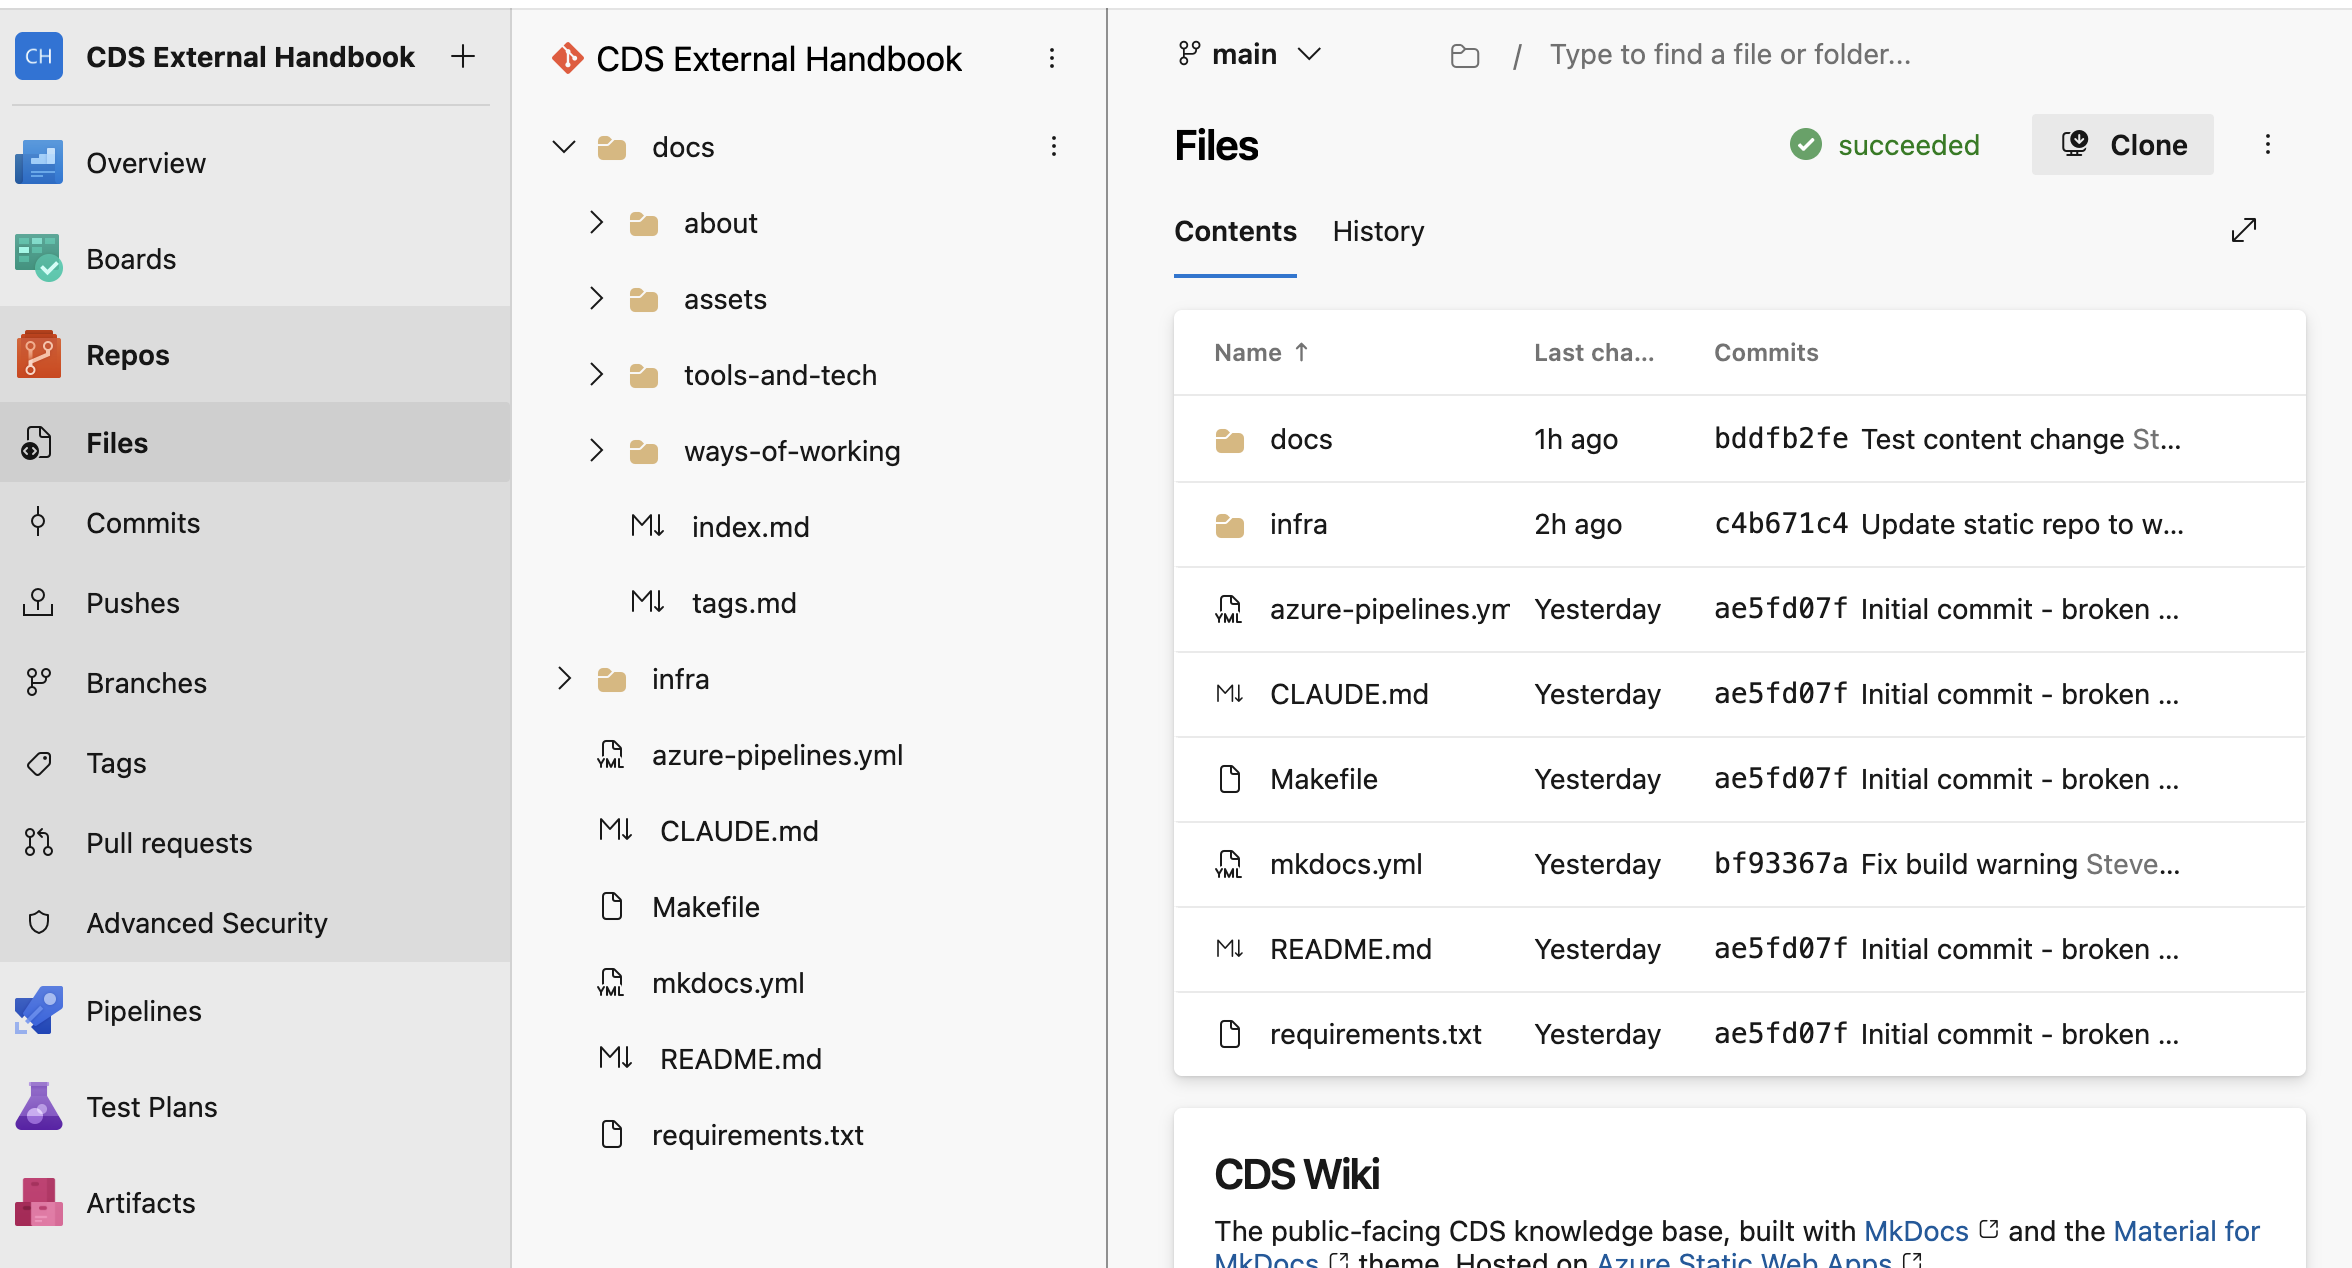
-
Click the file name to open it, then click the Edit (pencil) icon in the top-right corner.

-
Make your changes in the editor. Refer to the Markdown guide below if you need help with formatting.
-
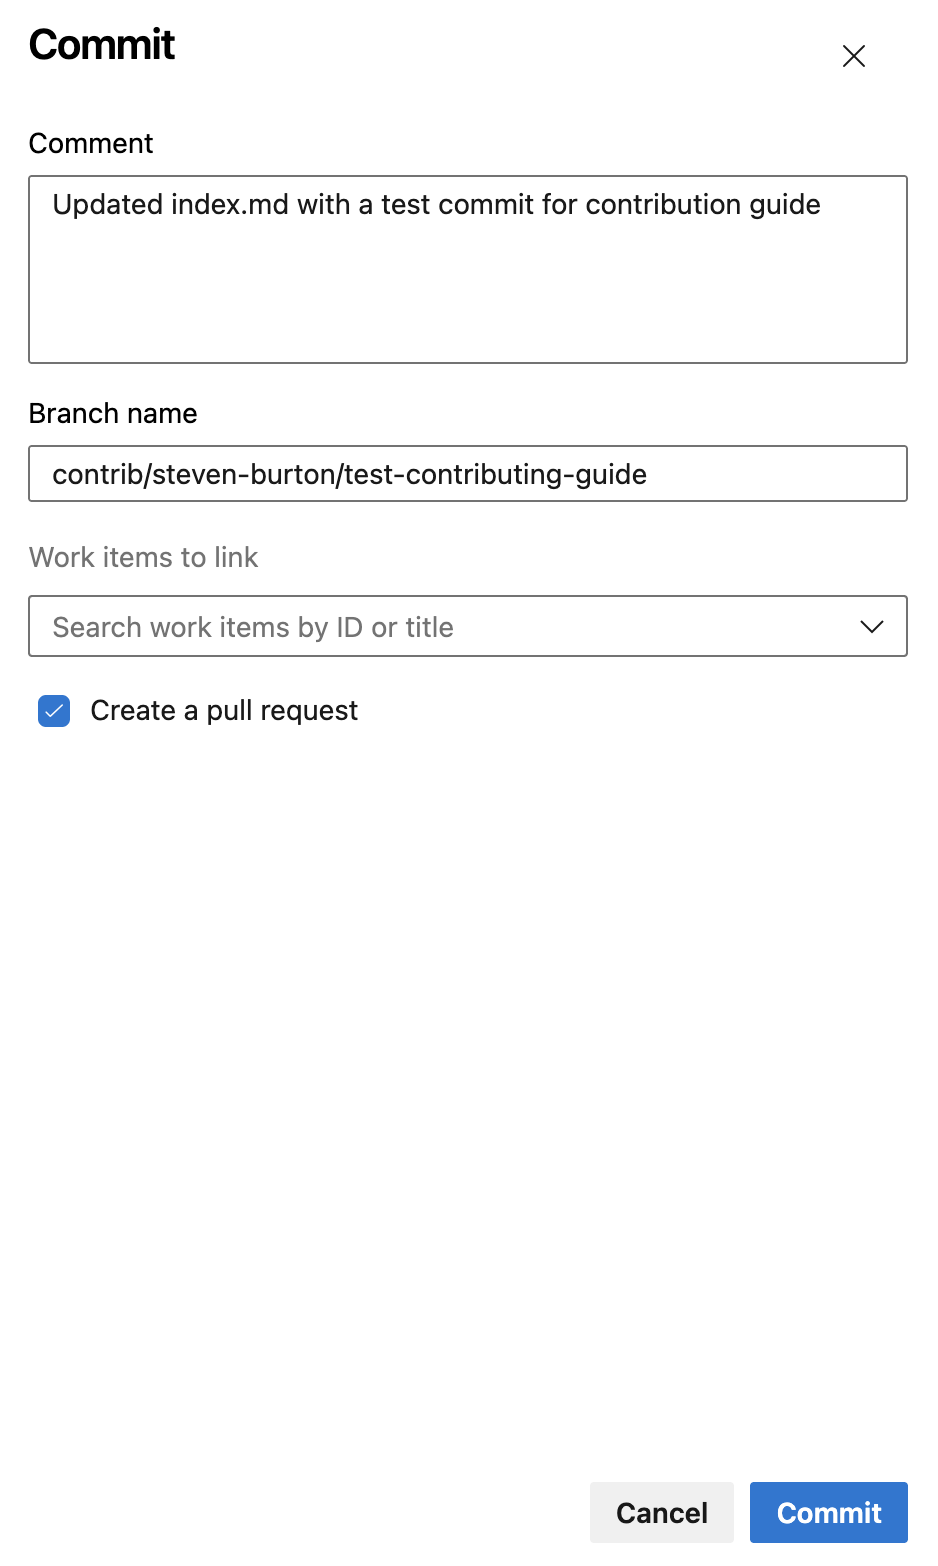
When you are done, click Commit in the top-right corner.
-
In the commit dialog:
- Write a short Comment describing your change (e.g. "Update agile practices — add retrospective section")
- Change the Branch name field from
mainto your new branch name, following the naming convention above - Tick Create a pull request
- Click Commit
-
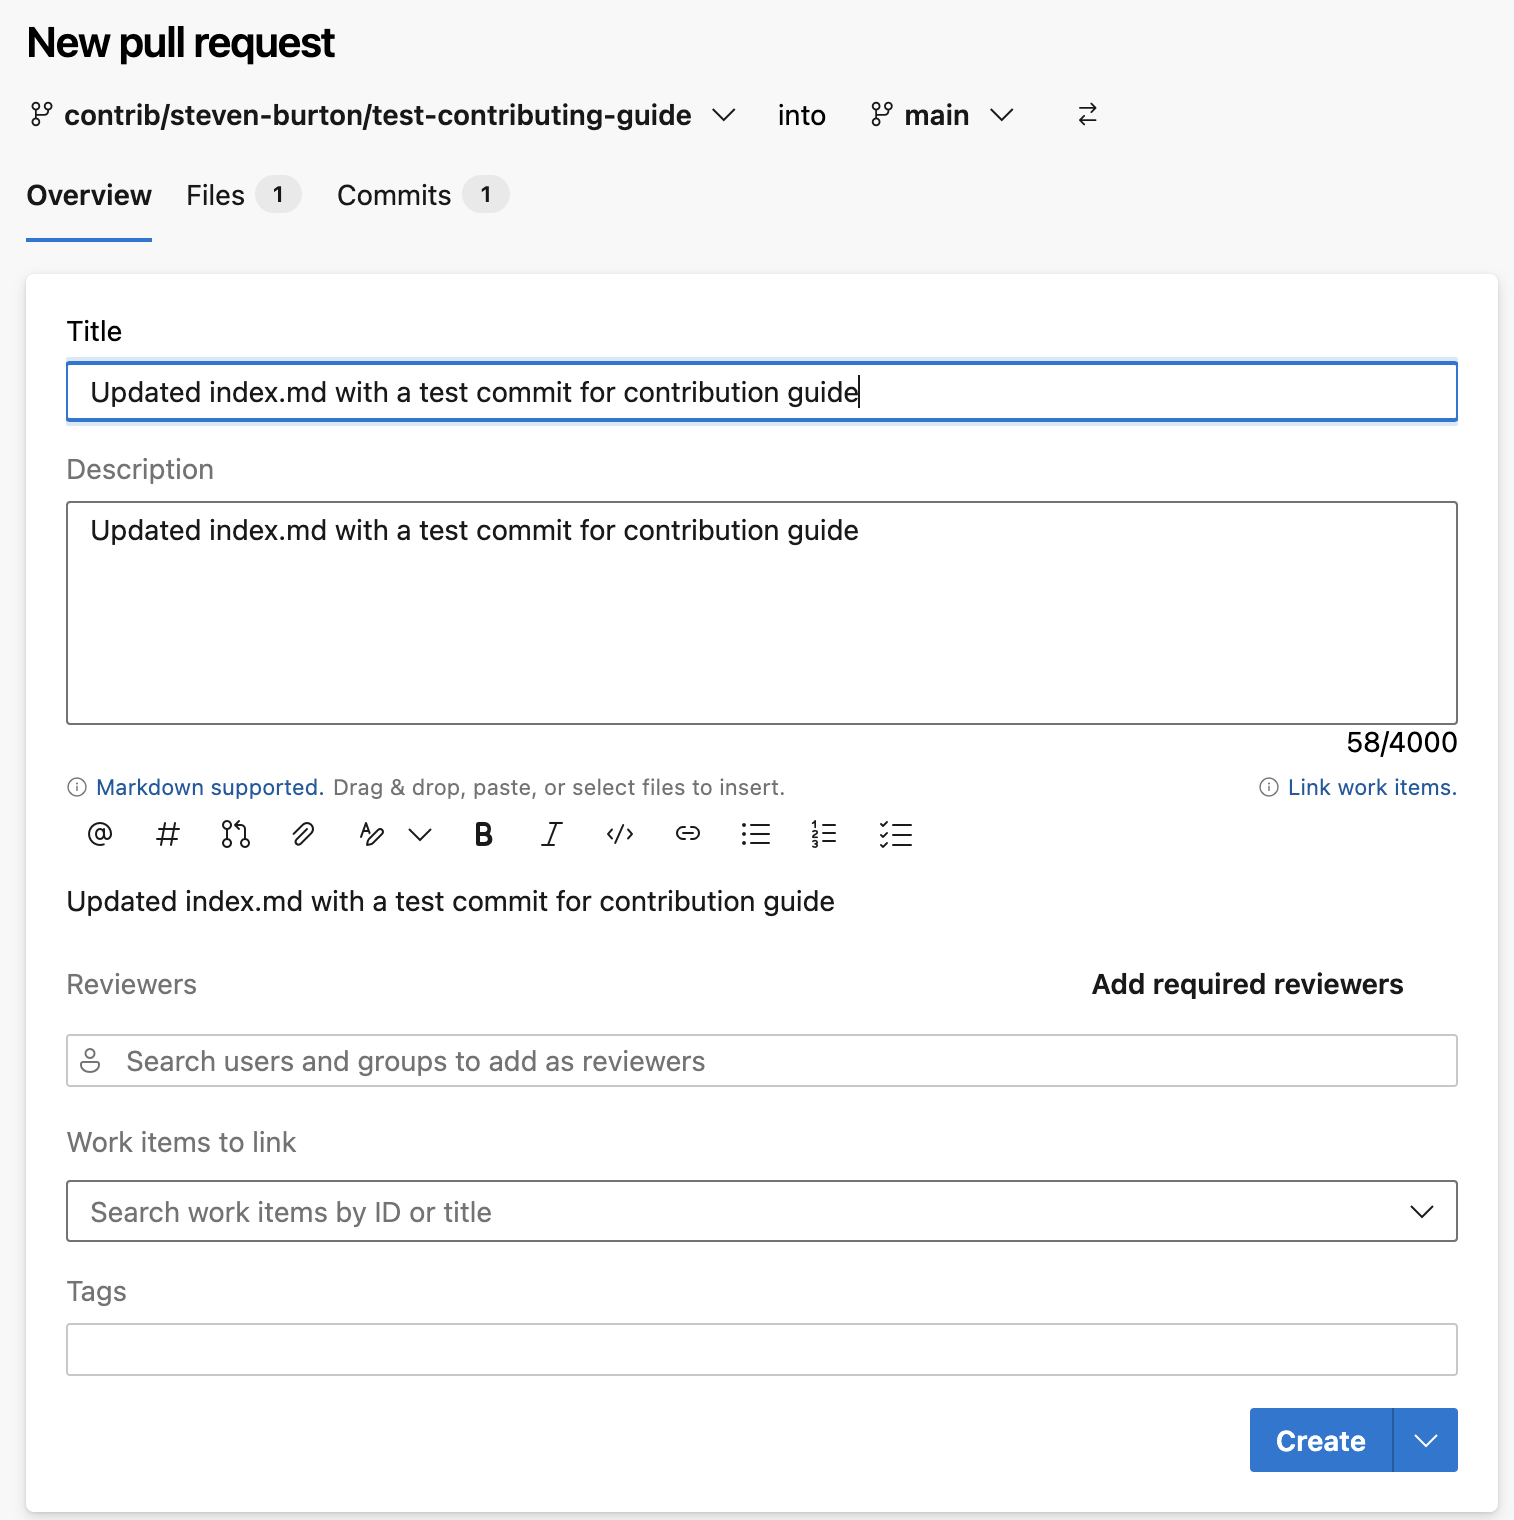
This opens the New Pull Request screen. ADO pre-fills the title and description from your commit comment — update them to be clear and descriptive:
- Title — a concise summary of your change (e.g. "Update agile practices — add retrospective section")
- Description — one or two sentences on what you changed and why
- Click Create
Your PR will be reviewed. You will be notified when it has been approved and the changes are live.
Creating a new page
Creating a new page requires one additional step — adding it to the site navigation — which the reviewer will handle before merging. You do not need to worry about this.
-
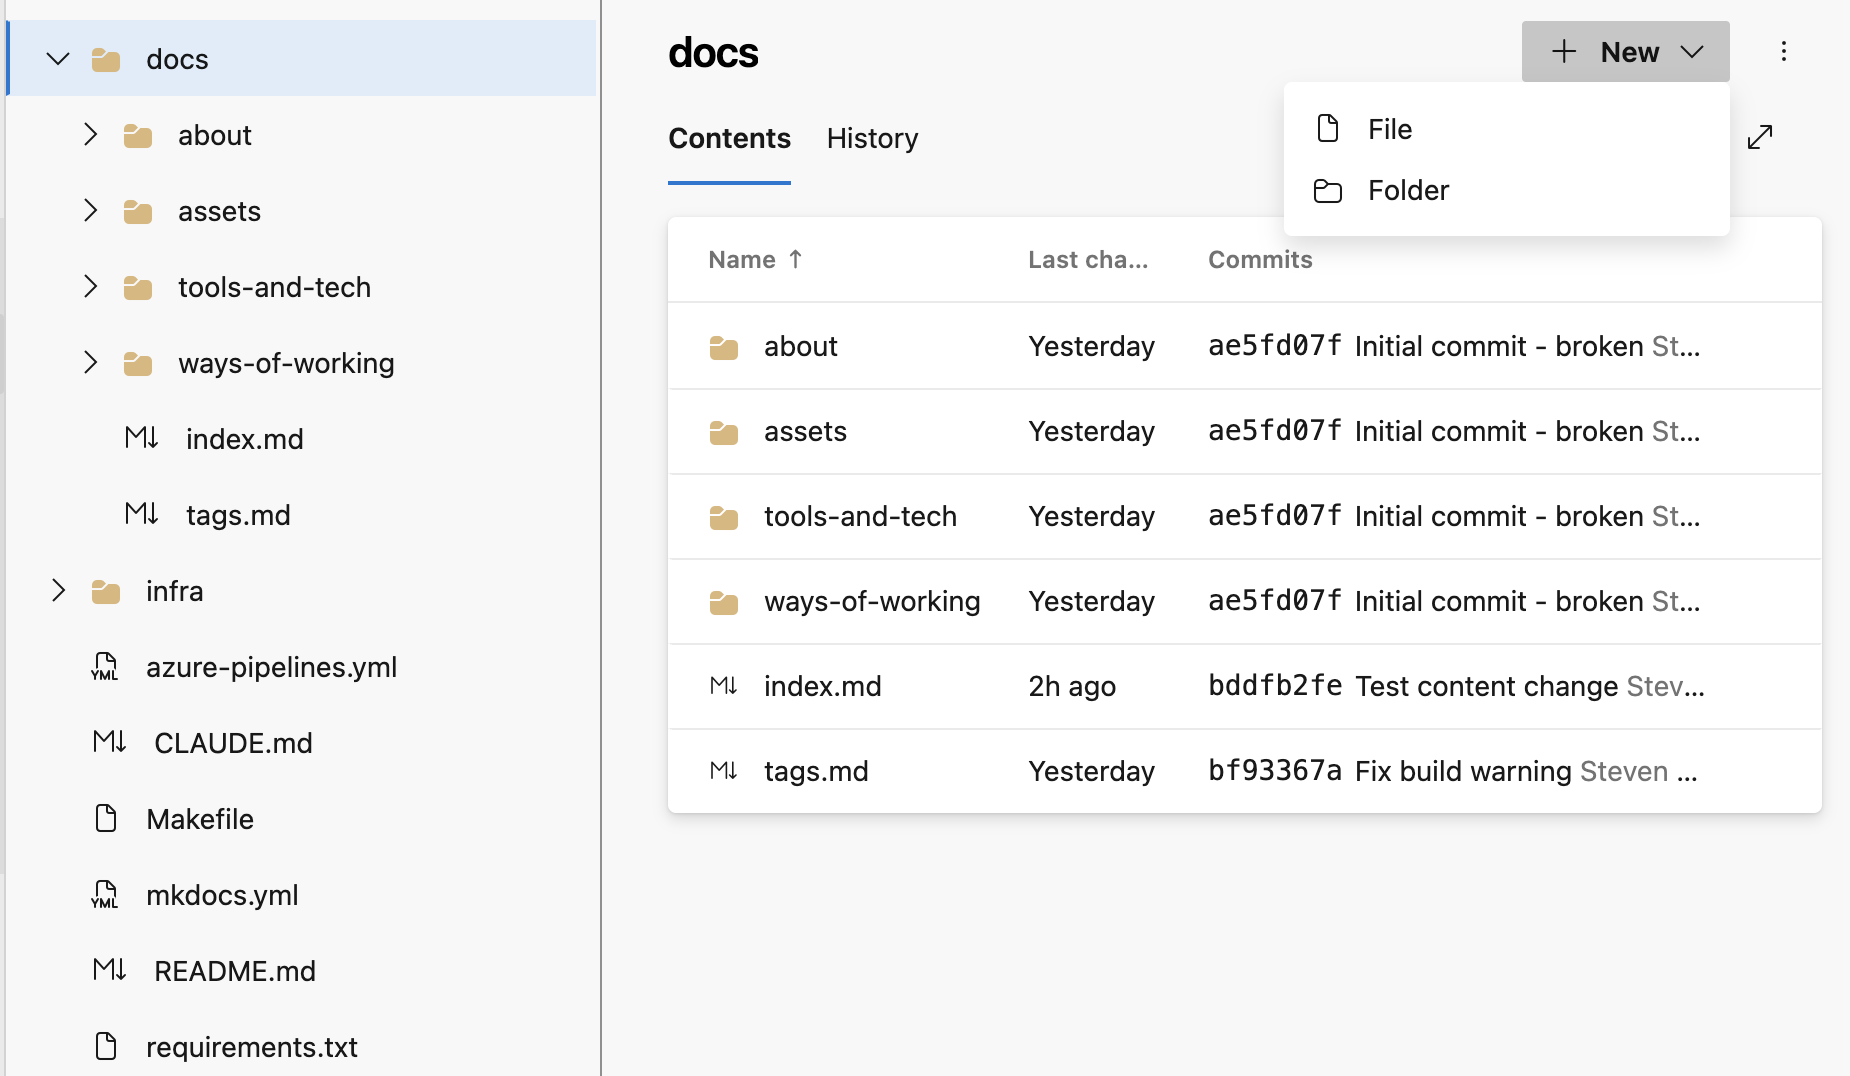
Open the repository and navigate to the relevant subfolder inside
docs/:docs/about/— life at CDS, culture, valuesdocs/ways-of-working/— agile, delivery, methodologiesdocs/tools-and-tech/— tools and technologies
-
Click + New at the top-right of the file list, then select File.
-
Name your file using lowercase words separated by hyphens, ending in
.md— for example,my-new-page.md. -
Start the file with a front matter block (see Front matter and tags below), then add your content.
-
Commit to a new branch and raise a PR as described in steps 5–7 above.
-
In your PR description, mention that you have created a new page so the reviewer knows to add it to the navigation.
Adding images via the browser
Images must be uploaded to the repository before you can reference them in a page.
-
Navigate to
docs/assets/images/in the ADO file browser. -
Click the
⋮three-dot menu at the top-right of the file list, then select Upload file(s).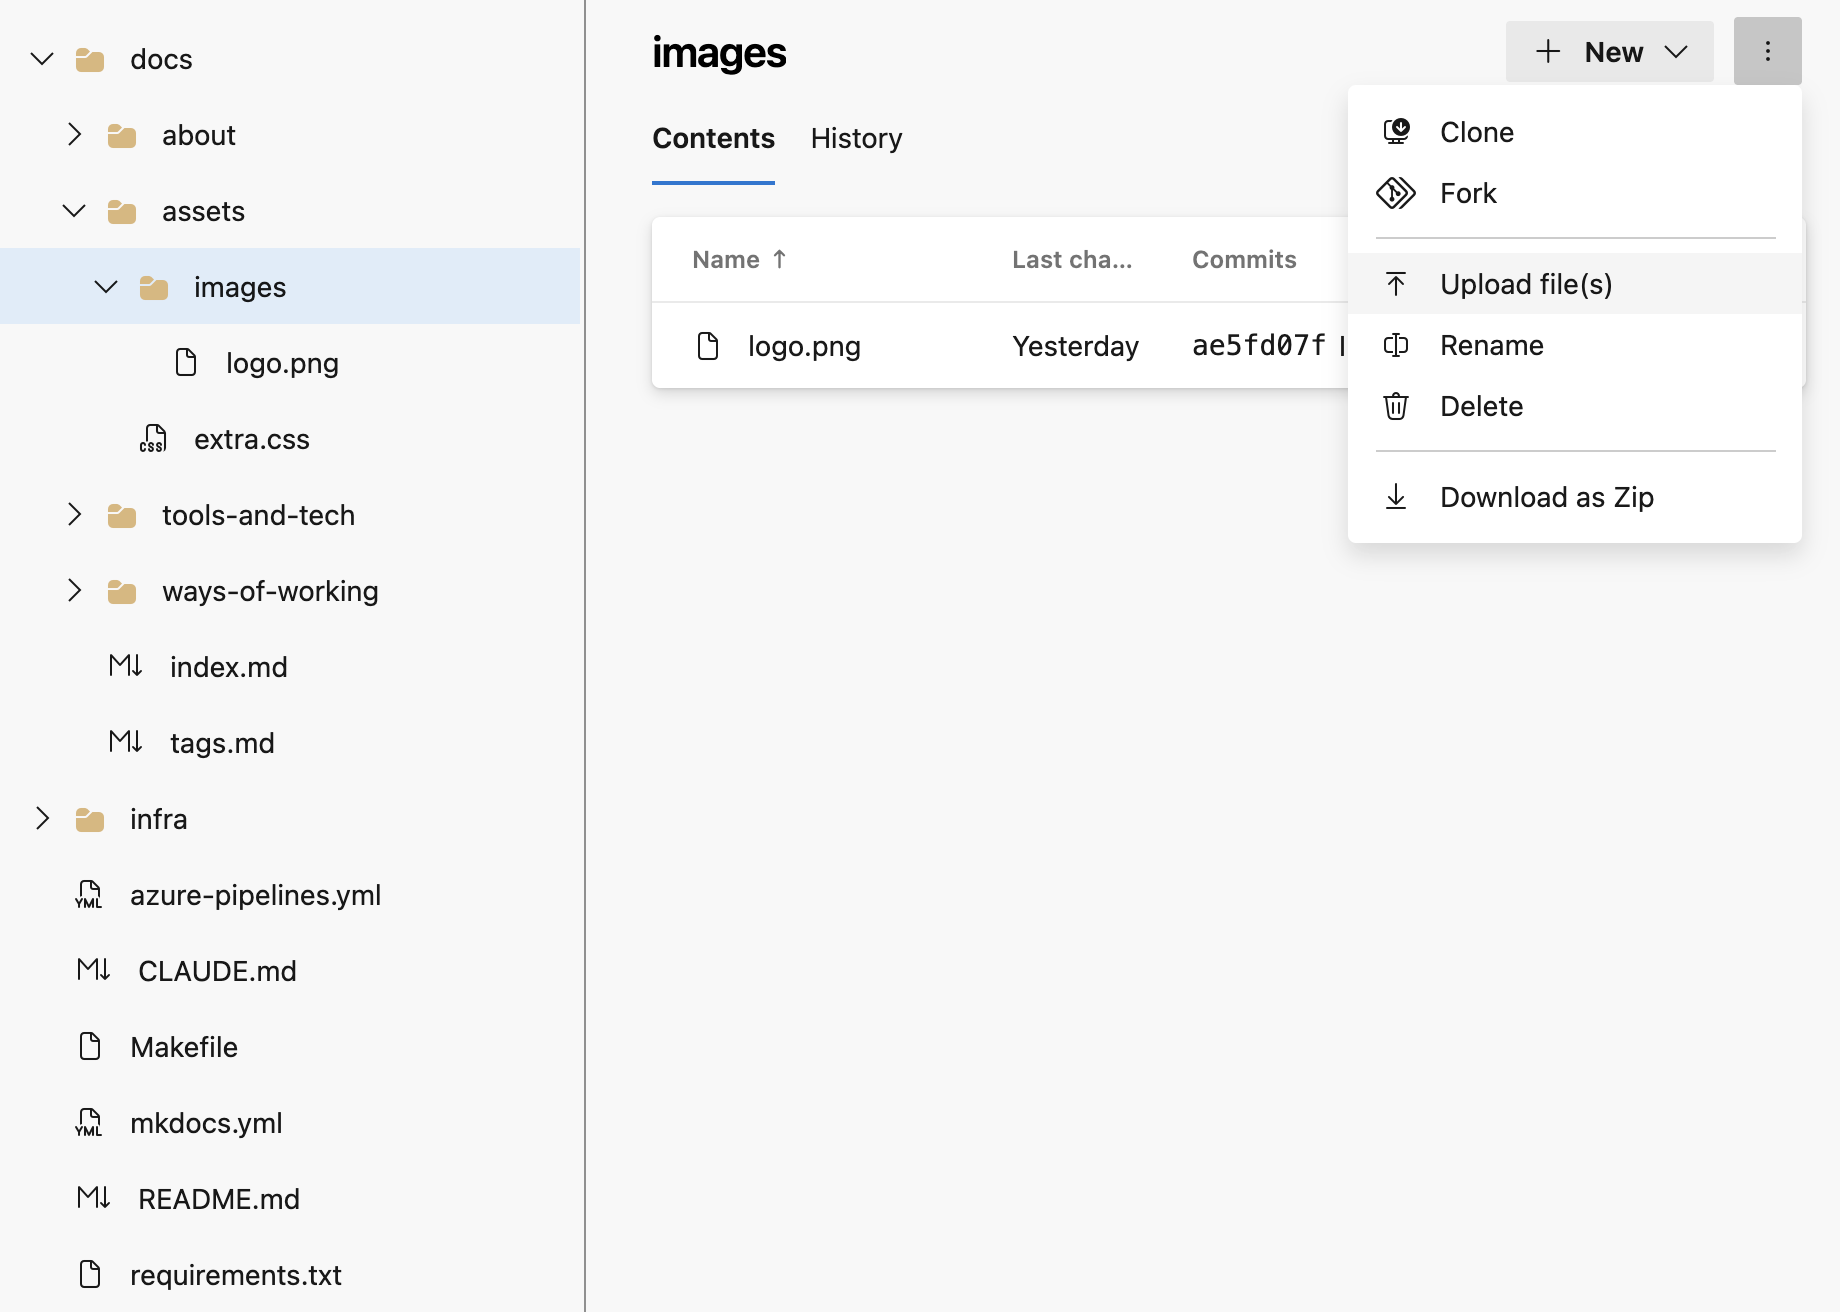
-
In the commit dialog, commit to the same branch you are using for your content changes — not to
main. -
Reference the image in your Markdown file (see Images in the Markdown guide below).
Making changes locally (for developers)
If you are comfortable with Git, you can clone the repository, make changes locally, preview the site, and push a branch.
Prerequisites
- Git
- Python 3.10 or later and
pip
Workflow
# Clone the repository (first time only)
git clone https://cdsdigital.visualstudio.com/_git/CDS%20External%20Handbook
cd "CDS External Handbook"

# Install dependencies
pip install -r requirements.txt

# Create a branch following the naming convention
git checkout -b contrib/your-name/brief-description

# Preview the site locally as you work (auto-reloads on save)
make serve

# When ready, stage and commit your changes
git add docs/your-file.md
git commit -m "Brief description of your change"

# Push your branch to ADO
git push origin contrib/your-name/brief-description
Then open ADO and raise a pull request against main.
Tip
Run make build before pushing to catch any broken links or formatting issues. The pipeline runs with --strict mode, so any warnings will fail the build.
Writing in Markdown
Handbook pages are written in Markdown — a simple formatting language that renders as styled HTML. Here is everything you need.
Headings
Warning
Every page should have exactly one # (H1) heading at the top. Do not skip heading levels.
Text formatting
Lists
- Bullet point
- Another bullet point
    - Indented sub-point

1. Numbered list
2. Second item
3. Third item
Links
[Link to an external site](https://example.com)

[Link to another handbook page](../about/our-values.md)
Use relative paths (starting with ../) to link between pages in the handbook. Do not hardcode the live site URL.
Images
Images must be saved in docs/assets/images/ before you can reference them. See Adding images via the browser above for how to upload them.
Once uploaded, reference an image in your Markdown like this:
The number of ../ steps depends on where your page sits:
| Page location | Image path prefix |
|---|---|
docs/your-page.md | assets/images/ |
docs/subfolder/your-page.md | ../assets/images/ |
Always write a meaningful description in the alt text — this matters for accessibility and is displayed if the image fails to load.
Tables
| Column A | Column B | Column C |
|----------|----------|----------|
| Row 1    | Value    | Value    |
| Row 2    | Value    | Value    |
Code blocks
Surround code with triple backticks and specify the language for syntax highlighting:
Callout boxes
Use admonitions sparingly — only for things the reader genuinely needs to notice.
!!! tip
    A helpful suggestion.

!!! note
    Something worth knowing.

!!! warning
    Something the reader must be aware of before proceeding.
Front matter and tags
Every page must begin with a front matter block that lists relevant tags. This powers the Tags index.
Use existing tags where possible. Common tags are: about, culture, values, ways-of-working, agile, delivery, tools, devops, azure, ai, contributing.
What makes a good pull request
- One change per PR — keep it focused. A PR that fixes a typo and rewrites a whole section is harder to review.
- Clear title — describe what changed, not just "update page".
- Brief description — one or two sentences on what you changed and why.
- Check your formatting — preview your Markdown if you can, and double-check image paths and internal links.
- New page? — mention in the description that the nav entry needs to be added.